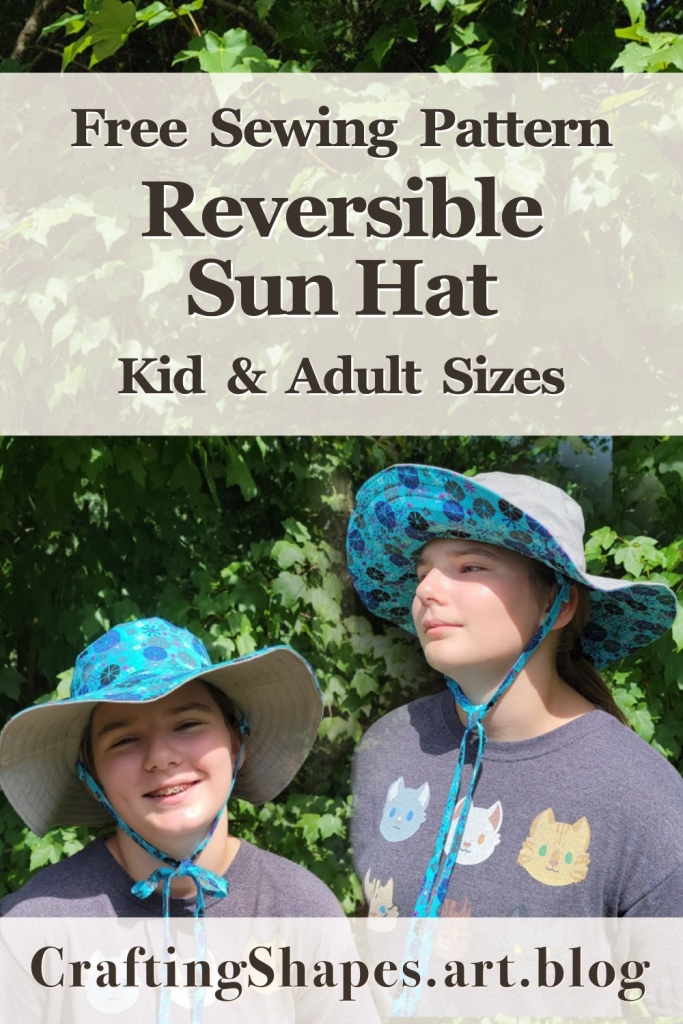
This is the third and final part of my sewing pattern for a wide-brimmed hat for kids and adults. If you’re looking for the other sections of this tutorial, you can click here for part 1 or click here for part 2.
Next, Add the Felt to Your Liner
Continue using Thread Color B in both your main spool and your bobbin for steps 13 and 14.

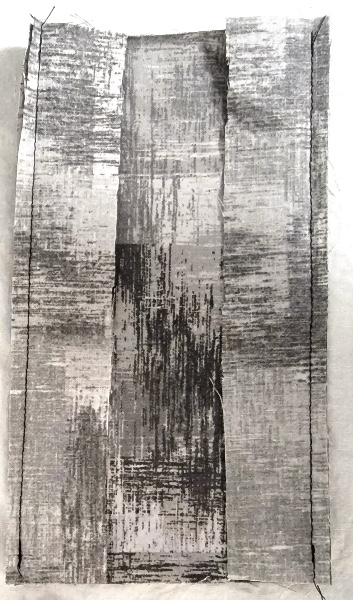
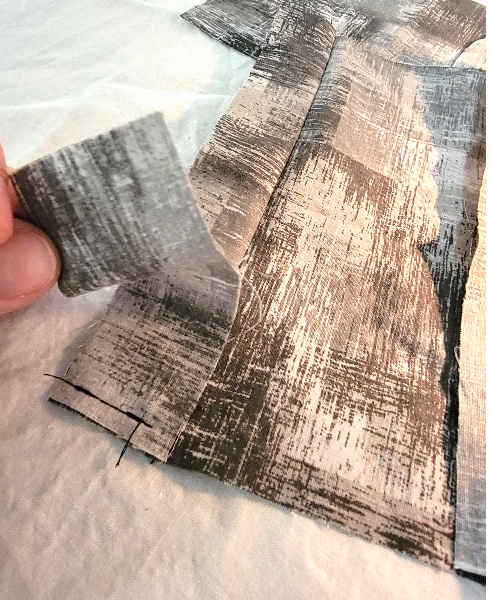
Step 13: Pin the felt pieces to the wrong side of your liner, as shown. The 3 felt pieces will overlap in such a way that each felt’s side edges will align with the brim’s pressed-open seams (see upper photo).
Once pinned, the felt’s inside curve should line up closely with the circular seam at the base of the crown. The brim’s outer edge will have about 1/4 inch with no felt on it.

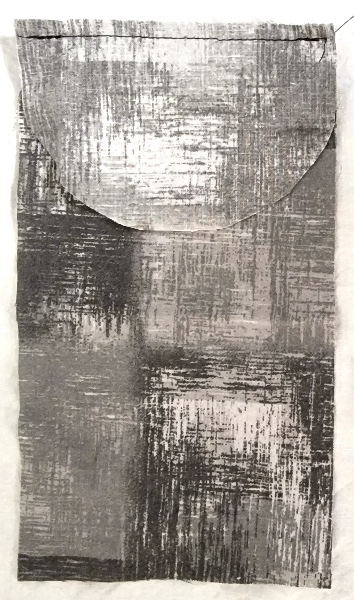
Step 14: With the felt still pinned in place, sew along the brims’s original seam lines, as shown. This will secure the felt to the brim in such a way that hides the stitching. Only sew along the brim seam. Do not sew onto the crown.
Time to Put the Two Sides Together!
For steps 15 through 18, use Thread Color A in the top spool, and use Thread Color B in your bobbin.

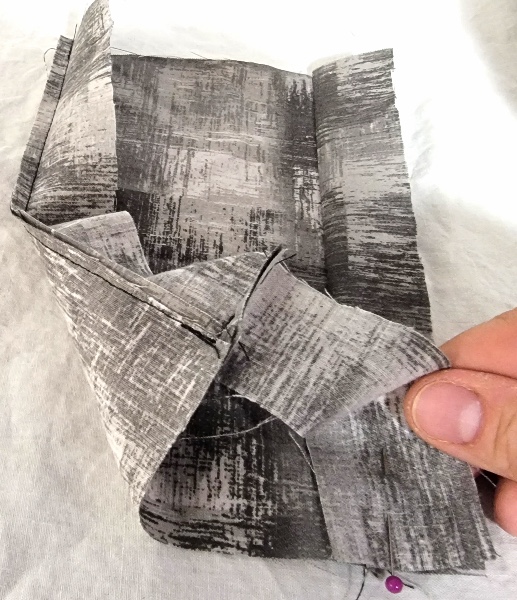
Step 15a: This is one of my favorite steps, because the hat really comes together here. Put the liner and the main fabric together with right sides together. Make sure you line up your brim seams and your loops carefully, and pin the two brims together around the outer edge.
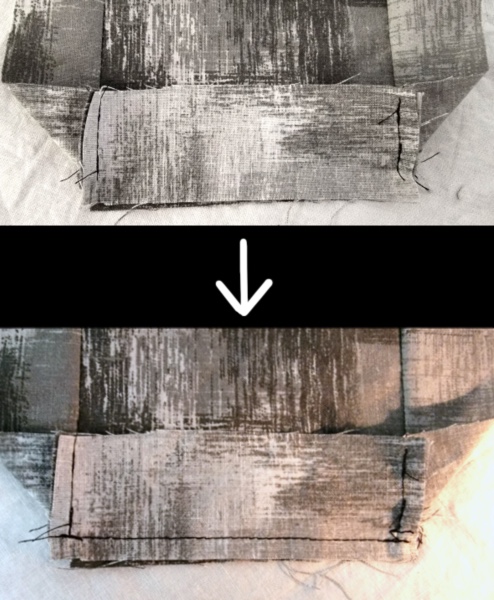
Step 15b: Sew the liner and main hat together around the brim’s outside edge with 1/4 inch seam, BUT leave a 3-inch unsewn gap to the right of the brim’s back center seam. You will need this gap to turn your hat right side out!
Note that the gap should be just to the right (or the left) of the back’s center seam. Don’t leave the gap dead center at the back, because it can be tough to close the gap later when it includes overlapped felt and other seams.

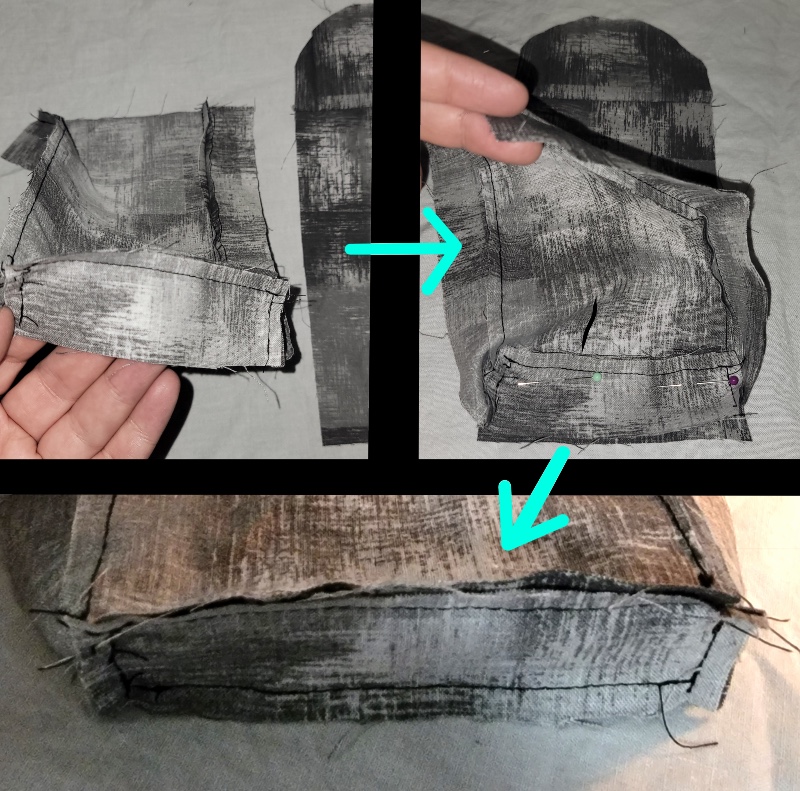
Step 16a: Turn the hat right side out. Push out the brim’s outer edge as much as possible.
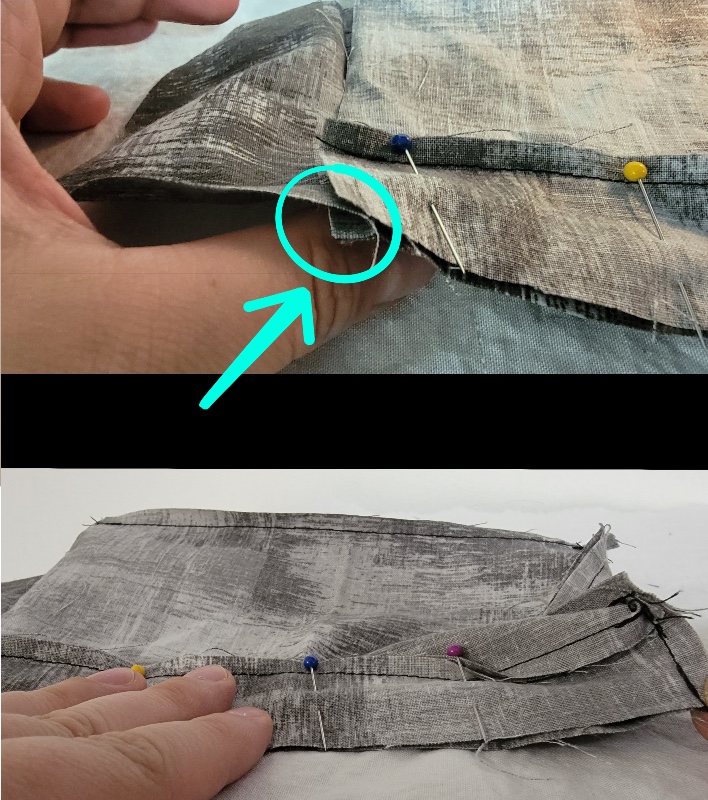
Step 16b: Now you need to close that gap. Start by folding your liner fabric over the felt’s curved edge, as shown in the top picture here, and pin it in place. I recommend placing a pin every 1/2 inch or so to help maintain a nice curved edge.
Step 16c: Fold the main fabric under and inside the brim, matching its curved edge with the liner as much as possible. Pin in place.
Notice in the bottom picture that I place perpendicular pins for step 16b, and then I use parallel pins for step 16c. I leave all these pin in, removing them only as the sewing needle approaches them in step 17. This helps me to keep a nice, gradual curve.

Step 17: Topstitch around the outer edge of the brim, 1/8 inch from the edge. This stitching will serve the dual purpose of sewing the gap closed from step 16, as well as being the first round of quilt-like stitching to shape the brim.
Tip: Start and stop this round of stitching near the back of the hat, in order to keep the front brim looking neat and seamless. Do this for step 18, too.

Step 18: Continue to topstitch the brim in circles, as shown. Each round of topstitching should be 1/2 inch inward from the previous round. Stop when you are less than 3/4 inch from the crown seam.
Important! As you get close to the crown, be careful and hold the loops out of the way to avoid sewing over them. Don’t forget to avoid the loops on the underside of the hat, too!
Tip: I recommend holding the brim’s unsewn fabric and felt in place with pins while you topstitch. This helps to stop the fabric from falling out of shape or bunching.
The Final Touch!

Step 19: Remember the two ties you made way back in step 1? Time to grab them and finish this puppy up.
There are two ways you can attach your ties to your hat. The first is simply to knot them on the loops, as shown in the top picture. When you want to reverse the hat, untie the ties and knot them on the loops on the other side of the hat.
The second method, which is my preference, is to add snaps to your ties. Attach the male end of the snap to the very end of a tie. Attach the female end to the same side, about 1 inch away from the male end, as shown in the bottom picture. Do the same to the second tie.
With this second method, you can use grommet snaps or sew-on snaps. I like to use sew-on snaps, especially when attaching them to multiple layers of fabric like this, because there is far less chance of messing up or damaging the fabric.
The only thing left to do now is enjoy a sunny day in your new hat! If you gave this pattern a try, share a picture in the comments below. And of course, don’t hesitate to leave a question if anything here needs clarification for you.