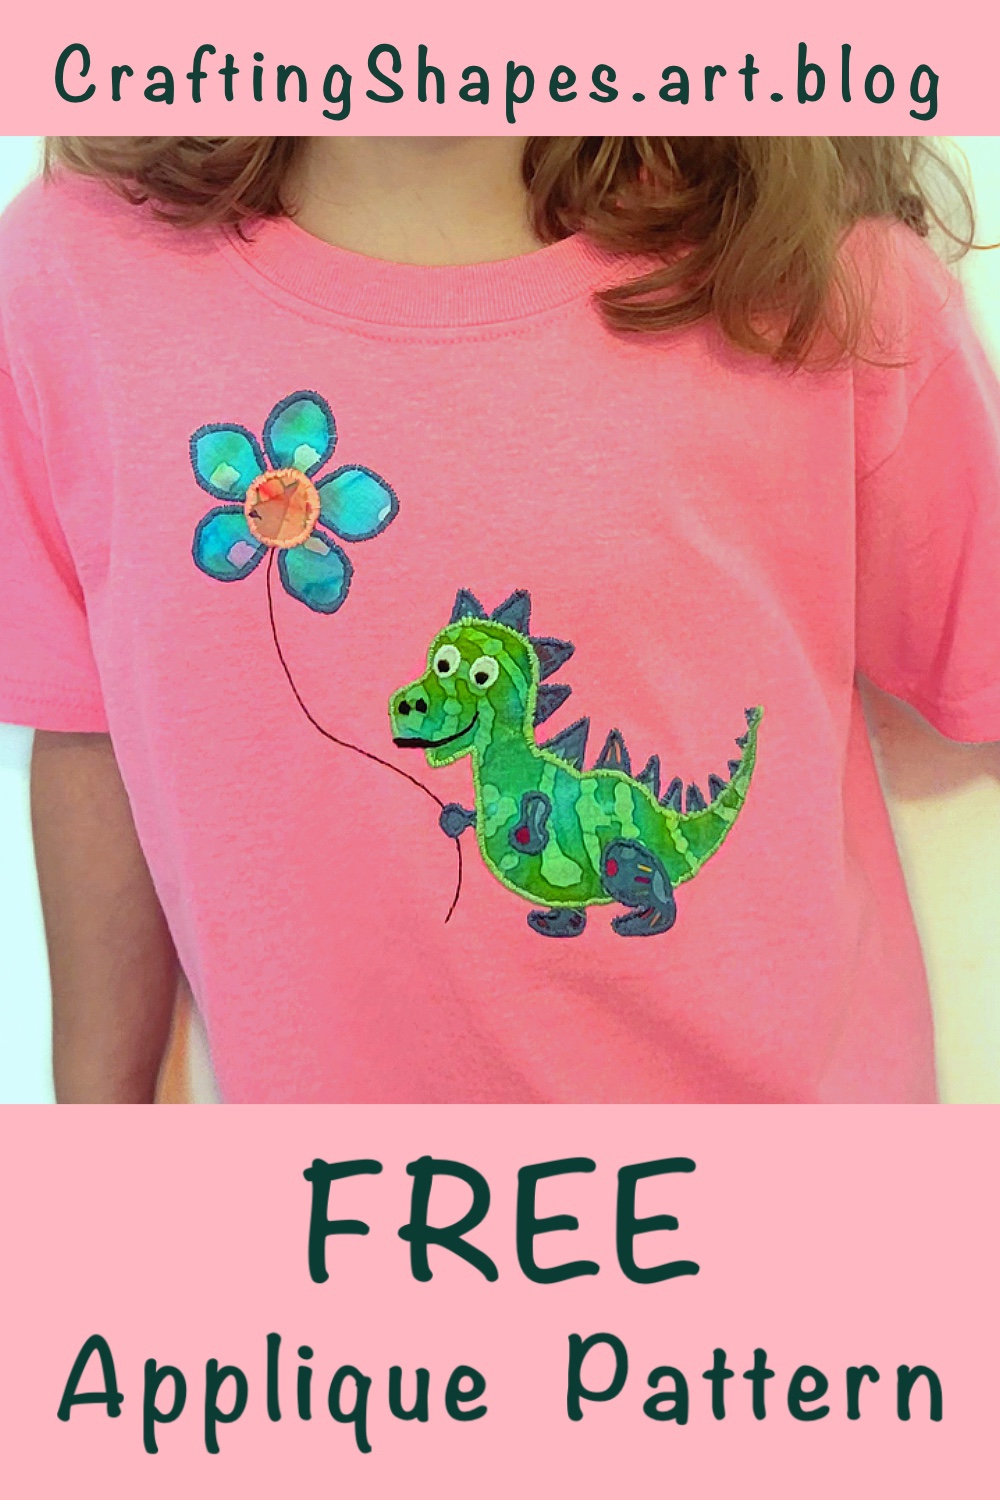
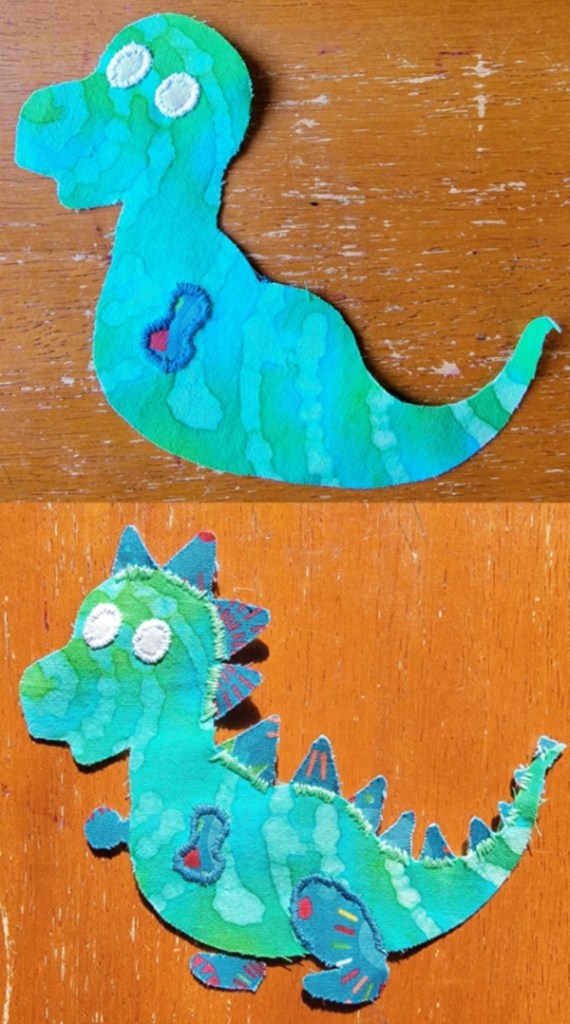
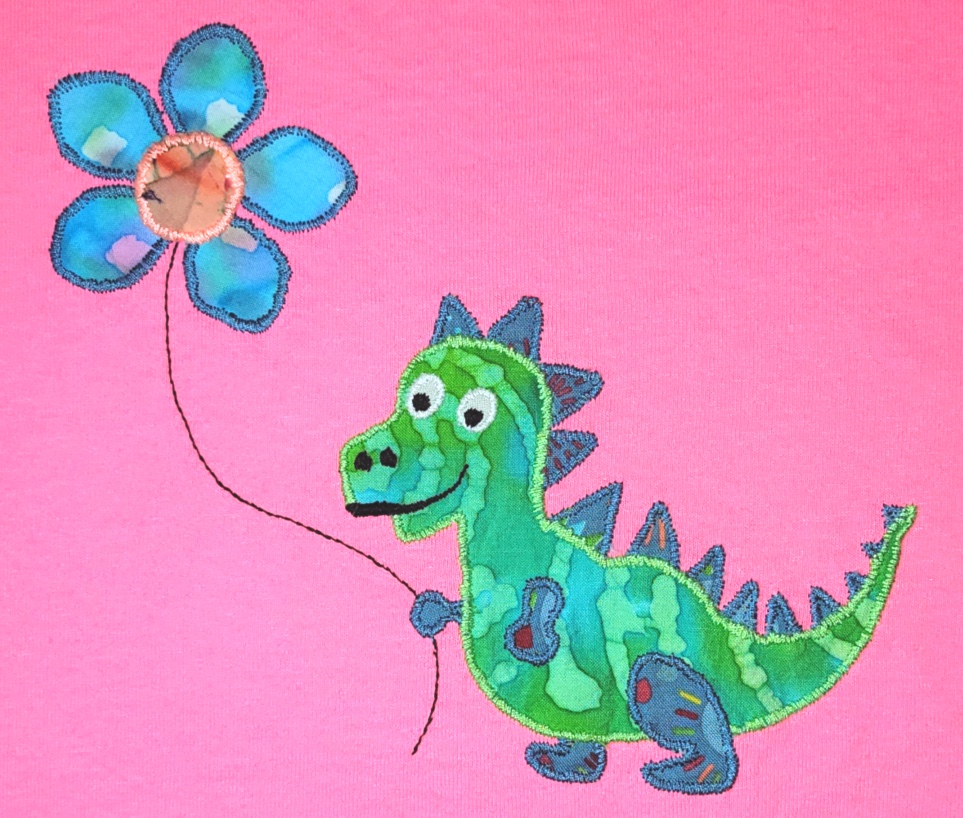
I’m still on my sewing kick lately, churning out clothes for my kids. I’ve had this bright pink t-shirt in my “might use this someday” craft bin for a couple years, so it was time to transform it into something with more personality. I drew this whimsical appliqué pattern of a dinosaur holding a flower-like balloon. The design was initially for my 2 year old who is obsessed with dinosaurs, but her older sister saw it, fell in love, and begged me for it. I figured why not? It will eventually make it to my 2 year old as a hand-me-down anyway, right?
The pattern uses three types of hand-worked stitches. The vast majority of it takes a buttonhole satin stitch to attach the appliqué and fill in some of the facial features. There is a small amount of invisible backstitch under the mouth — I will talk about this more later — and lastly, the balloon string is done with an embroidered stem stitch.
The finished size of this pattern as it exists in the printable PDF is about 8.5 inches wide by 9 inches tall. If you decide to resize the pattern, I recommend making it bigger, not smaller. Trying to shrink the pattern size will cause some of the fabric detail to become too delicate and frayed (for example, the eyes and the smallest back spikes).
Materials Needed for This Project
Shirt or other item to put your appliqué on – After all, you need a canvas for your appliqué project!
Fabric – I used leftover quilting cotton fabric scraps from older projects. Ultimately, you can choose whatever fabric scheme you like, but I opted for variety with no fewer than 5 separate fabrics.
Fusible Interfacing – I don’t bother with double sided fusible interfacing, because I just safety pin my pieces right to the shirt. It’s important to use at least single-sided interfacing here, though, especially on the really small pieces like the eyes. Otherwise your fabric will fray too much during sewing.
Thread – I used 5 different thread colors: color A matches the main body; color B matches the back spikes and flower petals; color C matches the center of the flower; white thread encircles the eyes; and black thread makes up the mouth, nose, eye pupils, and balloon string.
Pattern – Click here to download a one-page printable PDF of this free appliqué pattern.
Project Instructions
Step 1: Fabric preparation
As always, make sure your fabric is pre-washed and shrunk in the dryer before you cut ANYTHING.
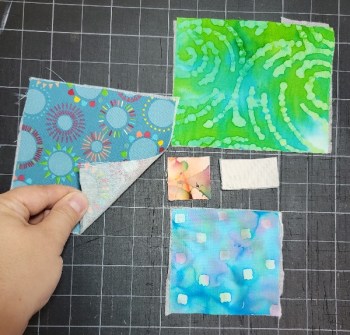
Cut some squares of fabric that are just big enough for your pattern pieces. Cut squares of fusible interfacing to the same size, and iron the interfacing to the wrong side of your fabric squares, as shown.
In the picture here, the green fabric square will be the dinosaur’s main body. The grey-blue square in my hand will be the dinosaur’s back spikes, arms, and legs. The smaller blue square will be the flower petals. Then the very small brown square will be the flower’s center circle. The smallest white rectangle will be the dinosaur’s eyes.
Step 2: Sew the flower pieces together
Before I sew anything to the shirt, I piece together as much of the dinosaur and flower as I can. The flower only has two pieces — the petals and the center — so I knock this one out first.
Note: I use two strands of regular sewing thread for all stitching throughout this project. Strands of embroidery thread should work just as well, if that is your preference.
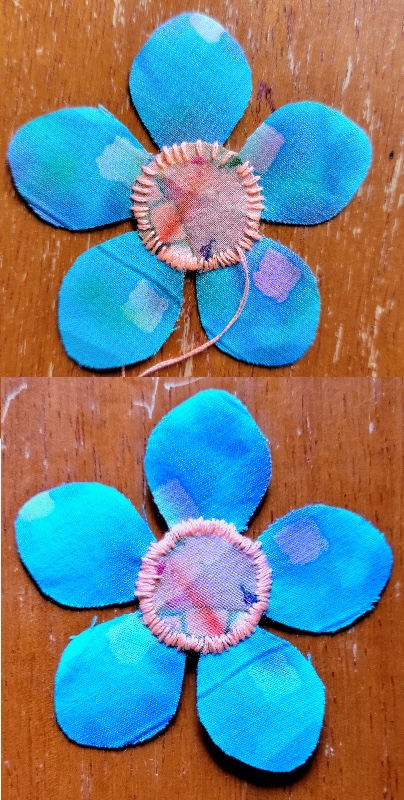
With a buttonhole satin stitch, sew the flower center on top of the petals, as shown. I like to go around once leaving gaps between my stitches. (See top picture to the left.)
Then I go around a second time filling in the gaps. This way helps me to ensure a smooth, round transition in the angles of the stitches. (See bottom picture to the left.)
Notice that when I reach the gaps in between the petals, I don’t skip the fabric. Instead, I continue my satin stitch on the center circle only until I reach the next petal.
Step 3: It’s the dinosaur’s turn!
Sew the eyes and single arm to the top of the dinosaur body with satin stitch, as shown in the top photo. Important! Especially when you place the eyes, don’t forget to leave untouched fabric along the edge of the dinosaur’s head and body. You’ll need this later when you sew the dinosaur to the shirt.
Once the eyes and arm are attached, position the dinosaur’s spikes and remaining limbs under the body, as shown in the bottom photo. Sew along the dinosaur’s back, attaching its body to its spikes, as I did with green thread in the bottom photo here. Important! When you reach the spaces between each spike, do NOT sew around the edge. Instead, skip to the next spike with your satin stitch. (Yes, this is the opposite of what you did with the flower above.) You’ll need these gaps later to sew the dinosaur to the shirt.
Lastly, place the dinosaur’s remaining leg on top of its body and sew it down with satin stitch. Only sew the edge of the leg with body underneath it. Leave the bottom part of the leg untouched for now, as shown.
When you finish this step, the dinosaur will not have any stitching around either foot, and only one of its arms will be sewn to the body. This is on purpose.
Step 4: Draw the facial features
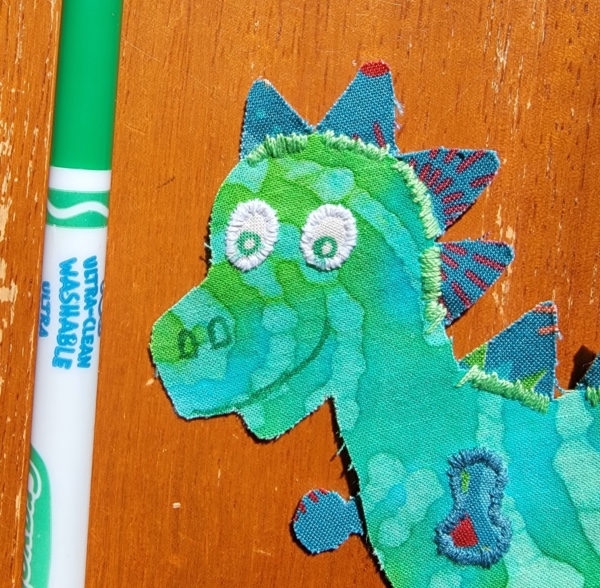
Before you start to sew here, I recommend you draw the dinosaur’s eye pupils, nostrils, and smile to make sure you like their placement.
You can do this with sewing chalk, but I personally love to use my kids’ Crayola ultra-clean washable markers. They are cheap to buy. They come in a bajillion colors, so I can easily match them to my fabric. And without fail, they always wash out completely when I put the finished project in the washing machine. The only downside is that my kids keep stealing my marker stash from me. Yeesh.
Of course, if you decide to go the marker route, I still recommend you do a spot test and wash to be safe. I don’t want to be the reason your project ends up with permanent ink stain!
Step 5: Sew the eyes and mouth
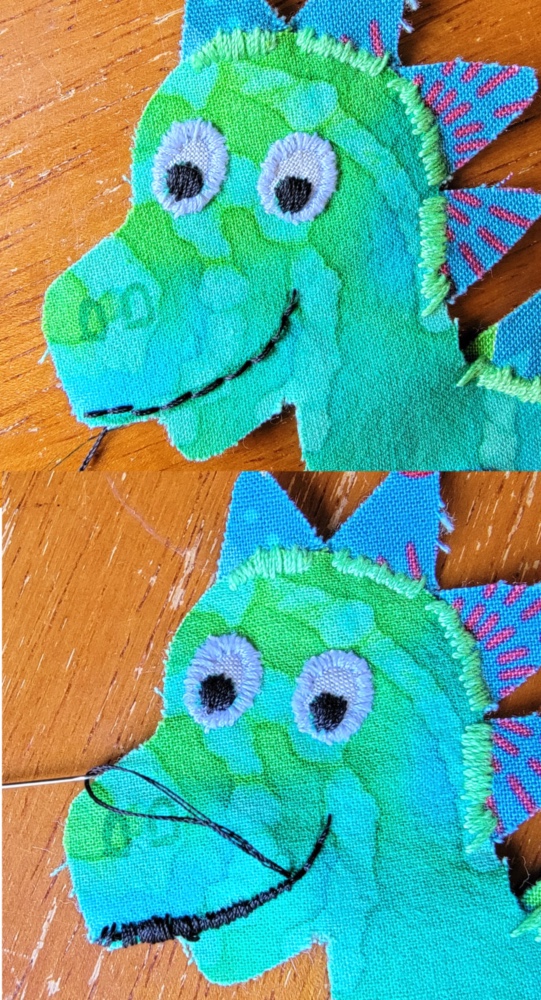
I sew the eyes and mouth using the same strand of thread. I start with the eye on the left, satin stitching the pupil. Then I do the eye on the right. From there, I jump straight down with my thread and sew a backstitch line along the smile. (See top photo.)
The reason for the backstitch is to give some shape and lift to the mouth, especially in the narrow area where the smile turns upward.
Satin stitch the mouth over the backstitched line. The widest part of the stitching on the left of the mouth should be just over 1/8″ tall. You’ll notice in the bottom photo that I left a few gaps in the satin stitch on the far left of the mouth. I will fill these gaps in later when I sew the dinosaur to the shirt.
As you sew the mouth, gradually taper the width of the satin stitch until it wraps snugly around the end of the backstitch. (See bottom photo.)
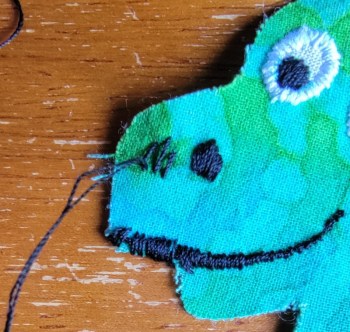
Step 6: Nostrils!
Sew the nostrils (or, as I like to call them, the “nose holes”) with satin stitch.
Step 7: Pin appliqué to shirt
Before you actually pin the applique to the shirt, make sure you have washed and pre-shrunk the shirt. If you are sewing onto a knit fabric (aka, stretchy fabric like my t-shirt here), I also recommend you iron some fabric interfacing to the inside of the fabric to stabilize it.
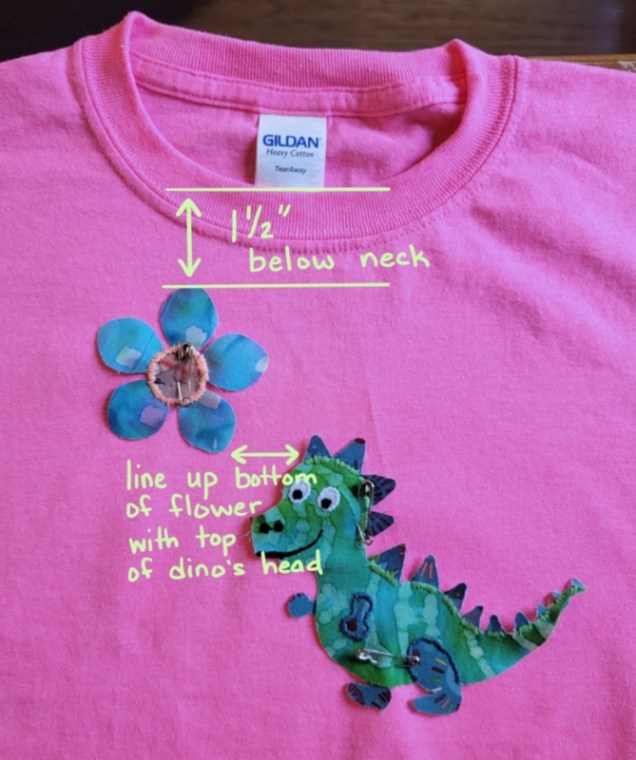
Pin the pieces to the shirt and make sure you like their arrangement. Do your best to center the overall image horizontally.
The top of the flower should be between 1 to 1.5 inches below the neck hole. The bottom edge of the flower will align with the top of the dinosaur’s head (the top of the green head, that is, not the spikes).
Step 8: Sew the applique to the shirt
I put my shirt into a 10″ embroidery hoop to stabilize it while I sew. If you do this, be careful not to stretch the shirt fabric in a way that distorts it.
With the exception of the balloon string (which I sew last), everything from here out is done with a buttonhole satin stitch. This is the order in which I sew the applique edges to the shirt…
- Flower petals – blue thread. This is all you need to attach the flower. You will not add any stitching to the center circle. Only the blue thread around the petals is needed here.
- Dinosaur body – green thread. Sew the green thread around the main body section. I recommend you start at the top of the mouth and go up and over the head. Work your way down the back and fill in the gaps between the spikes. (Do not sew around the spikes themselves.) Then sew around the tip of the tail, down the belly, and back up to the chin. (Do not sew over the front leg or the bottom of the mouth.)
- Spikes, remaining arms and legs – blue thread. Sew these sections as shown in the photo above.
- Mouth – black thread. Remember when you left a few gaps in the widest part of the mouth? Fill those gaps in now to attach the bottom of the mouth to the shirt.
- Balloon string – black thread. Before I sew the balloon string, I draw in a path with one of my Crayola washable markers. You can also use marking chalk or even a regular pencil — but be careful not to damage the fabric itself. Then I sew along this path with a stem stitch.
As I do all the sewing in this list, I end all threads by weaving them under the satin stitches. Knots will make the shirt uncomfortable to wear. If it seems like the threads on the inside of the shirt will be itchy or bothersome, you can also iron another layer of soft interfacing over the stitch work on the inside of the shirt when you’re done.
