Welcome to part 2 of my sewing tutorial for a wide-brimmed, reversible sun hat with removable ties. If you haven’t already printed your pattern and cut your fabric, click here to hop over to part 1 of the tutorial.
Ready to start sewing? Let’s get going!

First, sew your lightweight fabric pieces together.
THREAD COLOR: For the rest of this pattern, “Thread Color A” refers to the thread that matches your lightweight fabric. “Thread Color B” is the thread that matches your medium-weight liner fabric.
For steps 1 to 11, use Thread Color A in both your top spool and your bobbin.

Step 1a: Sew together your bias tape strips until you have two 30″ long pieces; then iron them into a double fold. This tutorial video shows you how to make double-fold bias tape.
Step 1b: To finish the ends of each bias tape strip, first unfold the strip’s end and lay it flat. Fold each corner toward the center so that the fabric ends in a point. Fold the point down, and then refold the original double-fold of the bias tape. Do this folding to both ends of the strip.

Step 1c: With the ends folded in, sew along your strips with a zigzag stitch. I use a width 2 (out of 5), length 3 (out of 5) zigzag stitch with my machine.
Once both strips are sewn, set them to the side. We’ll come back to these at the end for your hat ties.

Step 2a: Now grab the two rectangle shapes, which will be the hat loops for the removable ties. These are basically going to be folded and sewn like very short bias tape strips.
Step 2b: Fold both strips in half lengthwise and press with an iron.
Step 2c: Unfold the strips. Use the crease that you created with step 2b as a guide. Fold the sides inward so that the edges meet in the center, as shown in the picture. Do this to both strips, and press the new creases with an iron.
Step 2d: Fold both strips in half again along the original crease from step 2b. Sew along the length of the strips with a zigzag stitch, width 2 and length 3, same as you did with the bias tape in step 1b. However, this time do not fold under or finish the ends. Leave them raw.

Step 3: With right sides facing, sew the 3 brim pieces together with 1/4 inch seam. Press the seams open with an iron, as shown.
Step 4: With right sides facing, sew the 3 crown pieces together with 1/4 inch seam. Press the seams open with an iron, as shown.

Step 5a: Fold the brim in half with one of the seams at the folded edge. The other two seams will lie flat and overlap each other, as shown in picture 5a.
Step 5b: Fold the brim in half a second time, as shown in picture 5b. There are now 2 layers of fabric folded on the left side. Place a pin in each layer on the fold, as shown, with one pin on the outside of the fold and the second pin on the inside of the fold.. Do not pin the two layers together! The purpose of these pins is to mark the exact centers on the left and right sides of the hat. (Alternatively, you can also make a mark with chalk.)
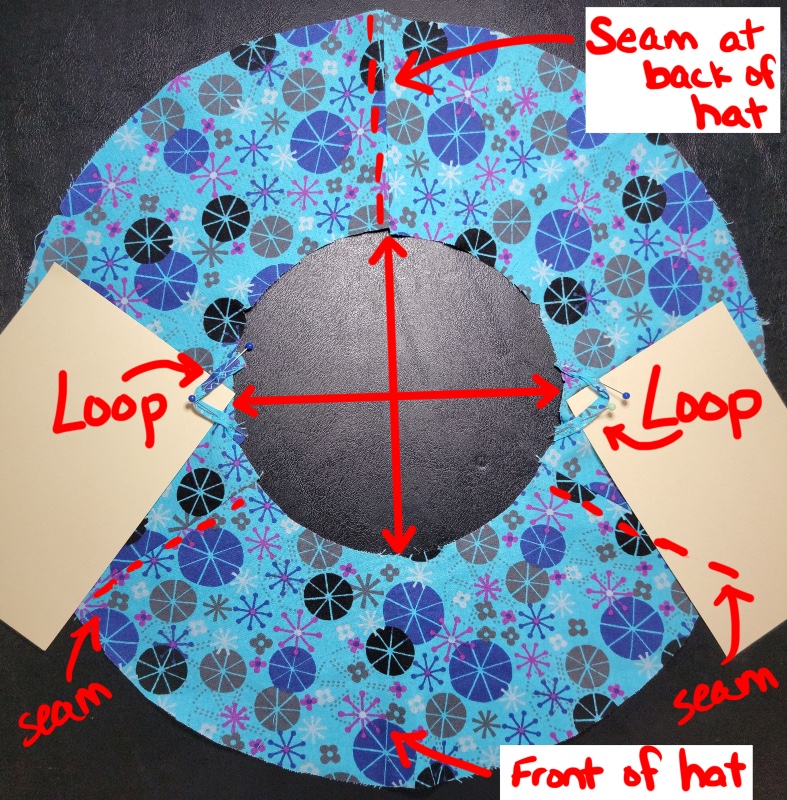
Step 5c: Unfold the brim all the way until it is a full circle again. Using the pins from 5b as markers. attach the loops to the right side of the brim as shown. The 5b pin marker should be at the center of the loop.

Checking in: This is how your brim should look right now. (I put some cardstock under the loops to make them easier to see.) Note that the back of the hat will have a seam, while the front of the hat will not have a seam. Keep this in mind as you start attaching sections in future steps.
Step 6: Sew 1/8 inch from the edge of the brim to attach the loops.

Step 7: Trim any excess loop so that its edges are flush with the brim’s edge.

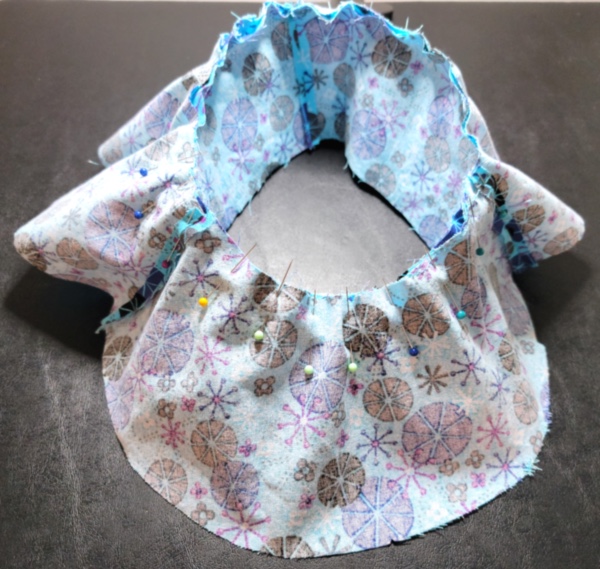
Step 8: With right sides together, pin the LARGER side of the crown to the SMALLER side of the brim, as shown. Be sure to match seams and notches to each other. Sew around with 1/4 inch seam.

Step 9: Press the seam from step 8 up toward the crown and topstitch it down. Make sure to push the loops toward the brim so they don’t get caught under the stitches. The topstitching should go all the way around the base of the crown, 1/8 inch away from the seam.

Step 10: Pin the circular top piece to the crown with right sides together, as shown. The double notch on the top piece should line up with the seam on the BACK of the hat (not either of the side seams). The other 5 notches on the top piece should line up with the remaining seams and notches on the crown. Sew all the way around, 1/4″ from the edge.
Advice: By putting your pins on the crown side, not the top, you’ll find it easier to avoid accidental fabric bunching while you stitch. Go slow on this round. I recommend pausing frequently to re-straighten your fabric as you work your way around.

Step 11: Press the seam from step 10 toward the crown, and topstitch it down. Topstitch all the way around, 1/8 inch away from the seam.
Now it’s time to sew the liner!
THREAD COLOR: For steps 12 to 14, use Thread Color B in both your top spool and bobbin.
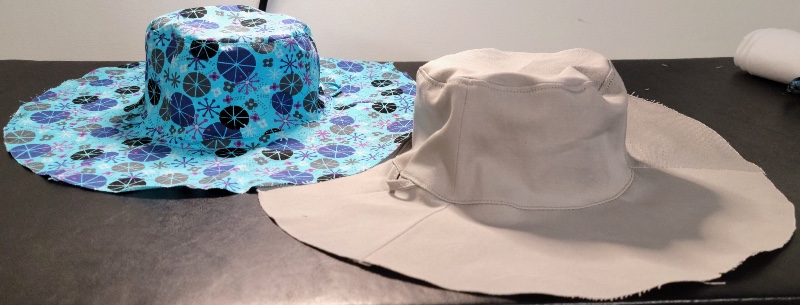
Step 12: Repeat steps 2 to 11 with your liner fabric. You will end up with the two halves of your hat, like the ones shown here.

You’re almost to the finish line now! Head on to part 3 of my sewing hat tutorial for instructions on how to put the remaining pieces together.
