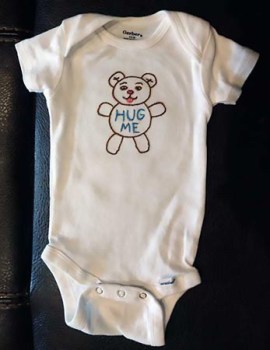
A lot has happened since my last post. I had a baby! It’s probably no surprise, then, that I’m going to be sharing some baby-related crafts these days. Here is my first one: a free embroidery pattern that’s ideal for a baby onesie. The example shown was stitched onto a pre-made white Gerber onesie using a 4-inch embroidery hoop. The entire project took me less than one weekend to complete.
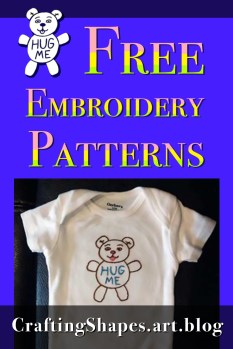
Click here to download a PDF of the “Hug Me Teddy Bear” pattern.
or
Click here to download a PDF of the pattern as a mirror image.
Tips and Techniques for Stitching Your Baby Onesie Embroidery Pattern

I put two layers of lightweight iron-on interfacing on the inside of the fabric – once BEFORE I start to stitch to stabilize the fabric, and then a second time AFTER I’m done stitching. The second layer of interfacing both keeps stitching in place and also ensures that the fabric won’t chafe against the skin.
With the first layer of interfacing in place, I stitched the entire pattern using stem stitch, except for the pink center of the nose, which uses satin stitch. Don’t worry about attempting any satin stitch for the eye pupils. They’re too small for that. Instead, simply do two small stitches right next to each other. That will be plenty.
I opted for stem stitch instead of back stitch for two reasons. First, I like stem stitch better for sharp curves (like around the eyes and tongue, for example). Second, and more importantly, stem stitch makes a much neater back side for the stitching. And when it comes to potential chafing against my baby’s skin, I want as little thread on the back of the fabric as possible.
Here is a closer image of the front of the embroidery. (Please pardon the wrinkles in the fabric… I hadn’t ironed out the crease from the embroidery hoop when I took this photo.)

My color choices, as you can see in the picture, are dark brown throughout (including the stem stitch outline of the nose), medium pink for the tongue and center of the nose, and turquoise for the “Hug Me” letters.
If you try out this pattern, I’d love to know what colors you chose to use. Share a picture of your stitching in the comments!
The Rules for This Pattern…
All patterns found on Crafting Shapes are fully my own designs unless specifically stated otherwise.
You are not allowed to… sell any part of this free embroidery Hug Me Teddy Bear pattern in part or as a whole, nor may you sell the finished creation that results from this or any other pattern on Crafting Shapes.
You are welcome to… print, duplicate, and create this project for your personal, non-commercial use. You are also welcome to give finished projects as gifts to others or donate them for free to charitable causes.
If you choose to share this free embroidery pattern online (such as on Pinterest or through your own blog), please link directly to this post to help support my ability to create future free patterns for all to enjoy. (Do not copy/paste the pattern into your own blog, for example.)
